Build a Parachute Tower Wooden Music Box Kit
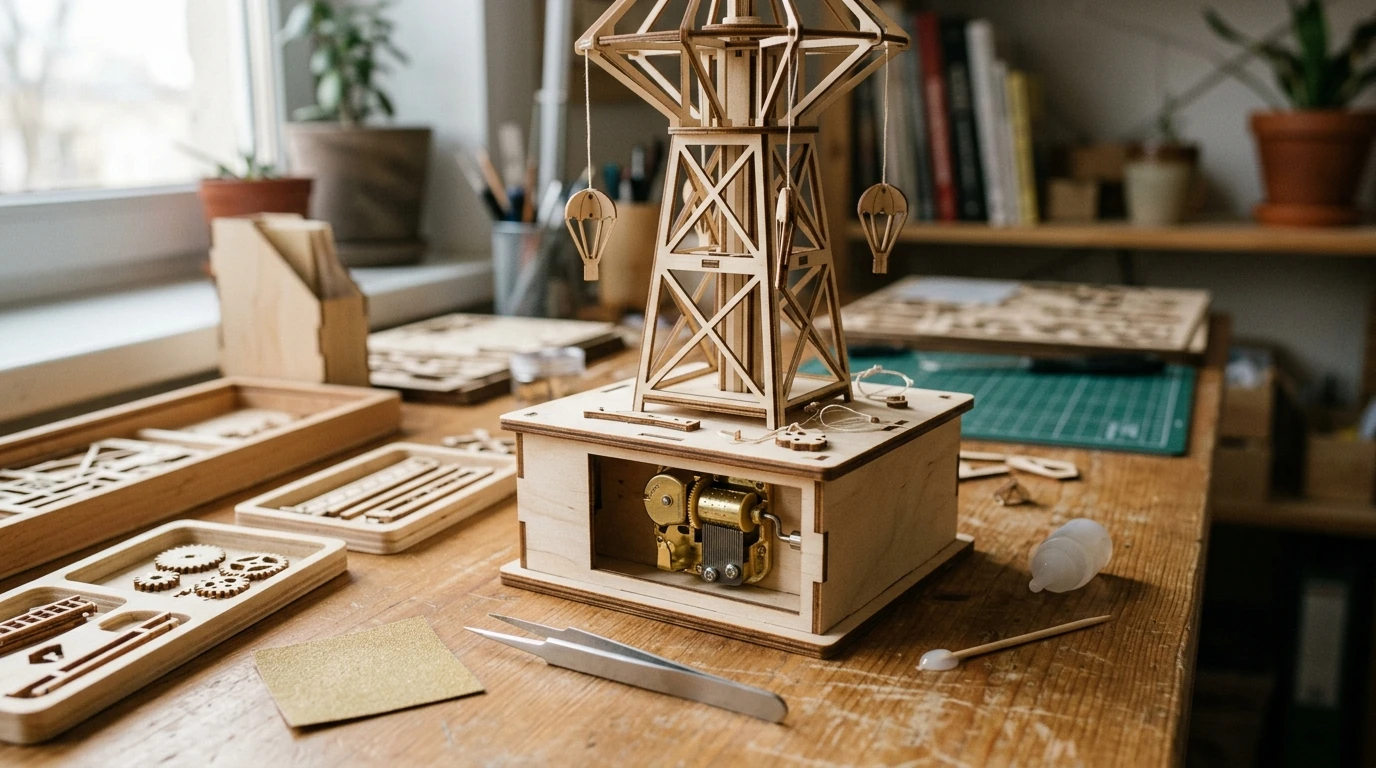
DIY Wooden Parachute Tower Music Box: Buildable Keepsake for Display and Sound
A wooden music box kit that becomes a detailed parachute-tower display brings two kinds of satisfaction: the calm of assembling precise parts and the reward of a finished piece that plays music and looks striking on a shelf or desk. This guide covers what to expect from the build, who it suits, practical setup tips, and how to care for it once it’s complete.
What Makes the Parachute Tower Design Special
The parachute tower theme stands out because it reads like décor first and a music box second. Even when it’s not playing, the tower silhouette and parachute-inspired details make it feel “complete” as a display piece rather than something that needs to be hidden in a drawer.
- A themed structure (tower + parachute motif) that looks like décor even when silent.
- Hands-on, step-by-step assembly that turns a box of parts into a functional display piece.
- Gift-friendly format where the build experience is part of the present.
- Compact décor for desks, bookshelves, and hobby corners—no wall mounting required.
If you’re curious about how music boxes evolved from novelty items to collectible keepsakes, the Smithsonian’s overview of music box history is a great read: https://www.smithsonianmag.com/arts-culture/the-history-of-the-music-box-180964003/.
What Comes in a DIY Wooden Music Box Kit (Typical Expectations)
Most DIY wooden music box kits follow a similar formula: pre-cut wooden sheets, a mechanical movement, and carefully sequenced instructions. The parachute-tower style adds more visual detailing, so it helps to be prepared for a higher piece count than a simple box-style build.
- Pre-cut wooden components designed to slot or press-fit into the tower and decorative elements.
- A music mechanism (often a wind-up movement) that powers the melody after assembly.
- Small accessory parts for fine detail work; sorting early helps prevent loss.
- Printed instructions; laying pieces out by step reduces mid-build confusion.
- Adhesive needs vary—some builds are fully interlocking, while others benefit from small amounts of craft glue in high-stress joints.
Before You Start: Setup for a Smooth Build
A good setup makes the difference between a relaxing evening project and a frustrating hunt for tiny parts. Plan for comfort first, then precision.
- Workspace: Use a bright, flat surface. A tray, baking sheet, or shallow box lid helps keep parts from rolling away.
- Helpful tools: Tweezers for tiny pieces, a small file or fine sandpaper for snug tabs, and toothpicks for controlled glue placement (if needed).
- Dry-fit habit: Test each connection before final pressure or glue to avoid split tabs or misalignment.
- Time planning: Build in short sessions so you stay patient during small-detail steps.
If younger builders will be nearby, be mindful of small parts. The U.S. Consumer Product Safety Commission provides helpful small-parts safety guidance here: https://www.cpsc.gov/Safety-Education/Safety-Education-Centers/Toy-Safety.
Assembly Flow: A Practical Step-by-Step Approach
While each kit’s instruction order matters, the overall rhythm is consistent: stabilize the base, keep the tower square, then add the delicate details when you no longer need to grip the model tightly.
- Sort and label: Group pieces by instruction step or by subassembly (base, tower frame, parachute décor, mechanism housing).
- Build the base first: A square, level base improves alignment for everything stacked above it.
- Assemble the tower frame in stages: Keep joints square; gentle pressure is better than forcing a tight fit.
- Install the music mechanism at the recommended step: Too early can make handling awkward; too late can block access.
- Add decorative pieces last: Fine elements are easier to place once the structure is stable and you’re not squeezing the sides.
Small fit issues are normal with laser-cut wood. If a tab feels too tight, a couple passes with fine sandpaper is usually safer than forcing it and risking a split.
Difficulty, Time, and Who It Suits
This style of kit rewards patience and careful alignment. It’s not complicated in concept, but it does ask for steady attention—especially when the build transitions from structural pieces to detailed ornamentation.
Quick Guide to Choose the Right DIY Build Experience
| Builder Type | Why It Fits | Suggested Approach |
|---|---|---|
| First-time DIY model builder | Clear steps and a rewarding final display | Work slowly, dry-fit every joint, avoid rushing the mechanism step |
| Gift buyer (experience + keepsake) | Build is part of the fun, finished piece plays music | Include a small tool kit (tweezers, sandpaper) and set aside a quiet build session |
| Decor-focused collector | Architectural tower shape stands out on shelves | Use gentle dusting habits and keep away from direct sun/heat |
| Hobbyist who loves precision | Many small parts and alignment steps | Sort pieces by subassembly and check squareness at each stage |
Getting the Best Sound and Motion After Assembly
Care, Storage, and Long-Term Display Tips
Product Options Available Now
- DIY Wooden Parachute Tower Music Box ($61.51)
- Women’s Color-Blocking Letter Embroidery Oversized Sweatshirt ($33.51)
- Women’s Sheepskin Mules ($52.51)
FAQ
Is this music box kit beginner-friendly?
Patient beginners can do well by sorting parts first, dry-fitting each joint, and building in short sessions. Expect small parts and alignment steps that reward going slowly rather than rushing.
Does it need glue or special tools?
Many kits rely on interlocking joints, but a small amount of craft glue can help reinforce stress points. Tweezers and fine sandpaper make detail work easier and reduce the temptation to force tight tabs.
How should it be maintained after it’s built?
Dust gently with a soft brush, keep it away from humidity and direct sun, and avoid over-winding the mechanism. For storage or transport, pad it in a snug box so tall tower elements aren’t pressed sideways.















Leave a comment