How to Hem Pants at Home for a Clean, Pro Finish
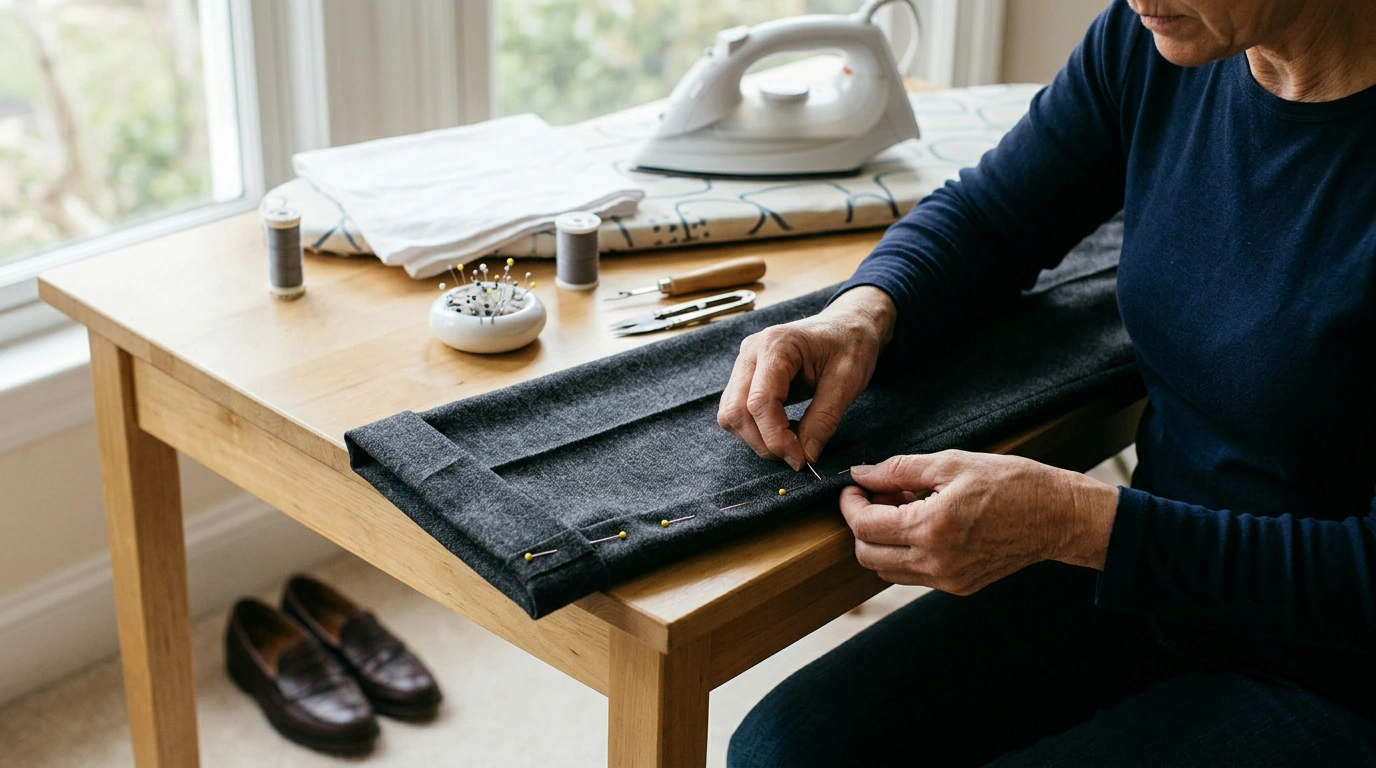
Why a clean hem changes everything
A crisp, even hem is one of those small details that quietly upgrades your whole outfit. It helps pants hang correctly, keeps fabric from dragging and fraying, and makes your shoes look intentional—whether you’re wearing denim on the weekend or trousers on a workday. Our team put together the same practical sequence we rely on for dependable, ready-to-wear results: pick the right hem style, measure with the shoes you’ll actually wear, press for accuracy, and stitch in a way that holds up wash after wash. For more guidance, see Making Perfect Garment Hems | New Mexico State University.
Start with the right hem for the fabric and fit
The “best” hem is the one that supports the fabric and the silhouette without adding bulk. For further reading, see ASG Sewing Blog – Page 7.
- Match hem style to leg shape: Straight and wide-leg pants can carry a deeper hem (it adds weight and helps the leg fall cleanly). Tapered legs often need a narrower hem to avoid a stiff “tube” at the ankle.
- Let the fabric decide: Denim and wool usually look better with a sturdier hem that holds structure. Lightweight synthetics and dressy fabrics often need a narrower, cleaner fold to stay smooth.
- Original hem vs. fresh hem: An original hem is popular for jeans because it keeps that factory wear line. A fresh hem looks sharper and more formal—great for trousers and chinos.
- Choose your shoes first: Hem length changes with sneakers vs. boots vs. flats. Measure with the footwear you’ll wear most often so the finished length feels natural.
Tools that make hemming faster, straighter, and less stressful
You don’t need a studio setup, but the right basics reduce rework.
- Measuring: Soft tape measure plus a hem gauge (or a ruler) helps keep the fold depth consistent all the way around.
- Marking: Tailor’s chalk or a washable fabric marker. Avoid ink pens that can show through light fabrics.
- Pressing: Iron and a pressing cloth. Most “professional-looking” hems are really “well-pressed” hems.
- Pinning and basting: Fine pins for dress fabrics; clips for denim; hand-basting for slippery fabrics that shift under the presser foot.
- Sewing: Universal needle for most fabrics, denim needle for heavy jeans, and polyester thread for durability with a touch of give.
- Finishing edges: Zigzag stitch, overcast stitch, or pinking shears to control fraying. A serger is helpful, not required.
Measure and mark: the method that prevents uneven hems
Uneven hems usually start with rushed measuring. This approach keeps both legs consistent.
Hem Style Quick Picks (by pant type)
| Pant type | Best-looking hem | Typical hem depth | Notes for a clean finish |
|---|---|---|---|
| Jeans (classic denim) | Original hem or double-fold stitch | 1–1.5 in | Use a denim needle; flatten bulky seams gently before stitching. |
| Dress trousers (wool/blends) | Blind hem (machine or hand) | 1.5–2 in | Press the crease line and hem edge for a crisp drape. |
| Chinos/cotton twill | Topstitched hem | 1–2 in | Finish the raw cut to prevent fraying and reduce lint. |
| Lightweight synthetics | Narrow double-fold hem | 0.5–1 in | Use a pressing cloth; don’t stretch the fabric as you sew. |
| Wide-leg pants | Deeper hem for weight | 2–3 in | Extra depth helps the leg hang straighter and look intentional. |
| Tapered/skinny pants | Narrow hem to reduce bulk | 0.5–1 in | Trim seam allowances at side seams so the ankle stays smooth. |
Cut, finish, press: the three-step foundation of a pro hem
Sewing options: machine hems, blind hems, and hand finishes
Fixes for common hemming problems (before they become permanent)
Make the upgrade feel complete: styling that shows off a clean hem
- Lean into the polish: a straight-leg pant with a fresh hem looks especially intentional with structured, cozy footwear like our Women’s Sheepskin Mules.
- If you go cropped or ankle-length, balance proportions with a relaxed top layer—our Women’s Color-Blocking Letter Embroidery Oversized Sweatshirt is an easy way to keep the outfit comfortable without looking sloppy.
- Want to keep your steps organized? Save this walkthrough—Your Guide to Flawless Pants Hems: How to Hem Pants at Home Like a Pro—so you can repeat the same measuring and pressing routine every time you tailor a new pair.
Helpful references (for deeper technique)
If you want extra stitch diagrams and machine settings, these trusted resources are worth bookmarking: Threads Magazine, Singer Sewing, and Coats & Clark.
FAQ
How do pants hems stay straight all the way around?
Put the pants on with the shoes you’ll wear, pin at the seams first, and mark the fold line from a consistent reference so both legs match. Press the fold in stages before stitching so the fabric doesn’t shift and the hem stays even as you sew.
What’s the best way to hem jeans without losing the original look?
Use the original-hem method: fold so the existing hem sits at the new finished length, stitch close to the original hem, then trim and finish the excess fabric on the inside. Manage bulk at side seams by flattening thickness and using a denim needle for clean stitches.
Can pants be hemmed by hand without looking homemade?
Yes—use a slipstitch or a blind hand hem with tiny, evenly spaced stitches that catch only a thread or two of the outer fabric. Matching thread color and firm pressing are what make the finish look smooth and intentional.















Leave a comment